How do Invites work?
What are Invites?
To add Team members to your Welcome screen, you need to invite them to Arrival App. When you send an invitation to a Team member, they receive an email with a link that prompts them to provide the phone number Arrival App will use to notify them when a visitor of theirs has arrived.
You can also use Invites to invite Team members who will not appear on the Welcome screen, but who will help you manage Arrival App settings. Learn more about this option here.
How do I send Invites?
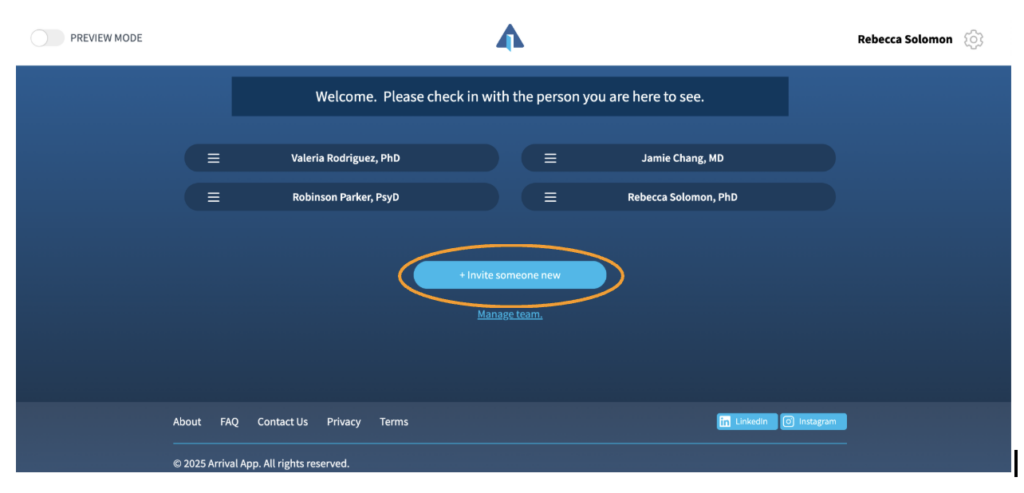
- Log in to Preview Mode.
- Click on Invite someone new.
- If you are not currently on the Welcome screen, Arrival App will prompt you to add yourself by checking a box. However, if you have already been added to the Welcome screen, this box will not appear.
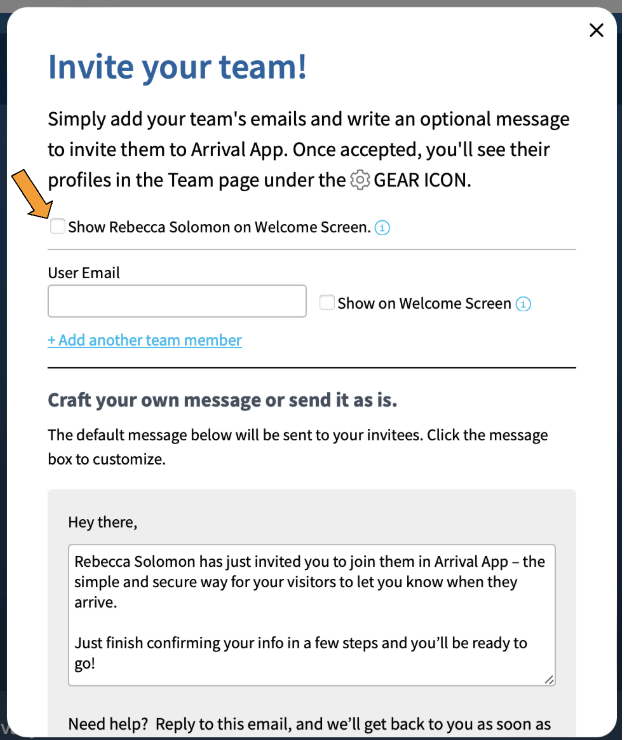
- Enter the email address(s) of the Team member(s) you wish to invite to Arrival App.

- For each Team member who will appear on the Welcome screen, check the box Show on Welcome screen next to their name.

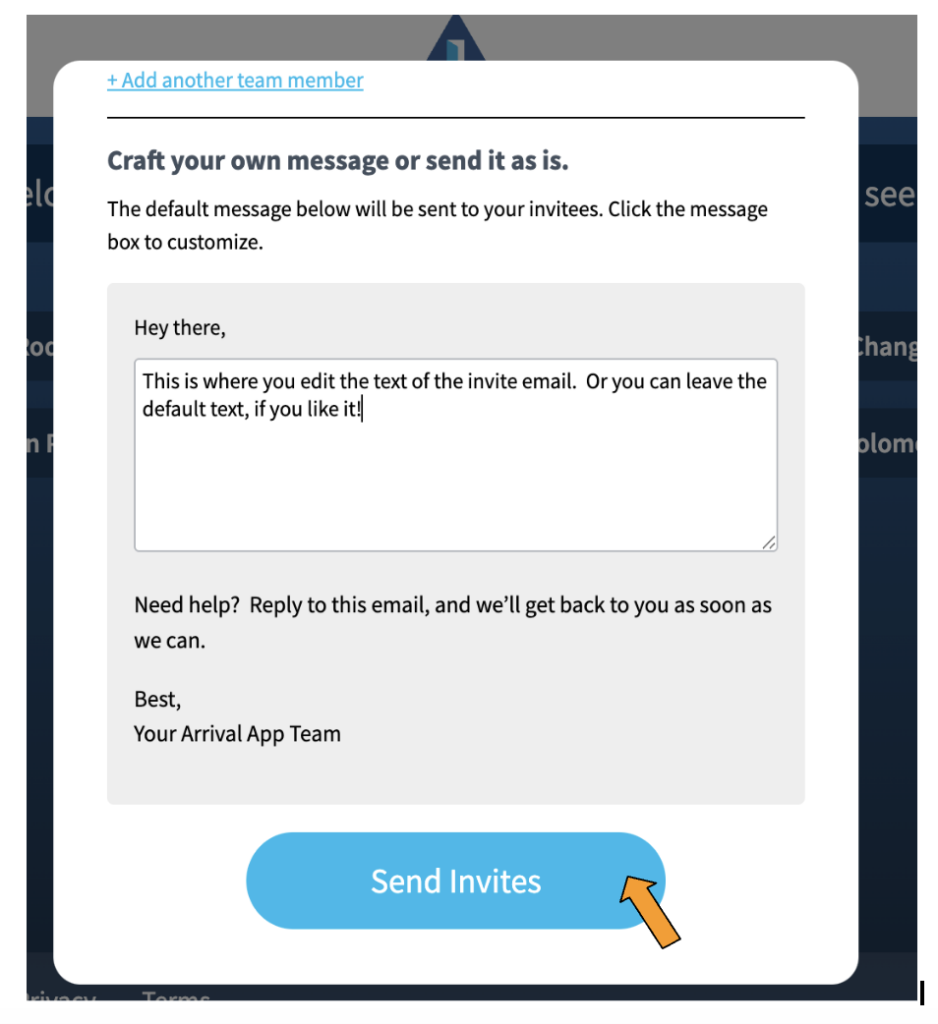
- If needed, customize the contents of the email they will receive.

- Click Send Invites.
What does Show on Welcome screen mean?
When you invite Team members who receive visitors to appear on your Welcome screen, you should check the Show on Welcome screen box next to their email address.
When these Team members receive their invite, they will be prompted to provide a phone number for Arrival App to use to notify them when their visitors arrive.
You may also have Team members who do not receive visitors, such as an Office Manager. For example, you may wish to give your Office Manager access to Preview Mode, so they can log into Arrival App and perform tasks such as inviting new Team members. In this instance, you would leave the Show on Welcome screen box unchecked. When these Team members receive their Invite, they will not be prompted to provide a phone number, and will simply be asked to confirm the email address they will use to log into Arrival App.
What happens when an Invite gets sent?
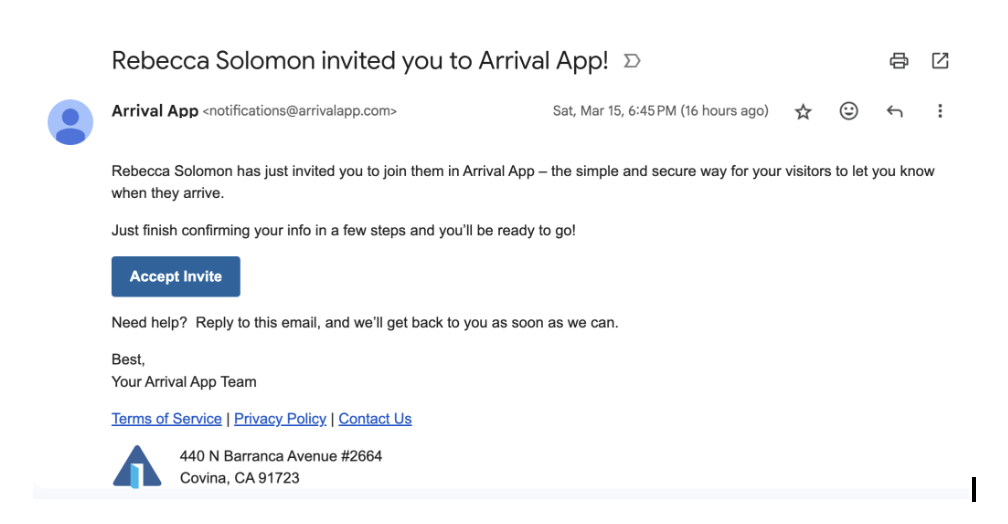
When you send a Team member an invite, they receive an email with a link to accept their invite.
If you have indicated that the Team member is to appear on your Welcome screen, once they click on the link in their email, they will be asked to designate their display name, i.e., how they wish to appear on the Welcome screen.

For example, they may wish to appear as Dr. Jane Smith, or Jane Smith, MD. You can make changes to their display name any time from the Team page.
They will next be asked to confirm their email address, and to create a password.

Then, they will need to provide and validate their phone number.
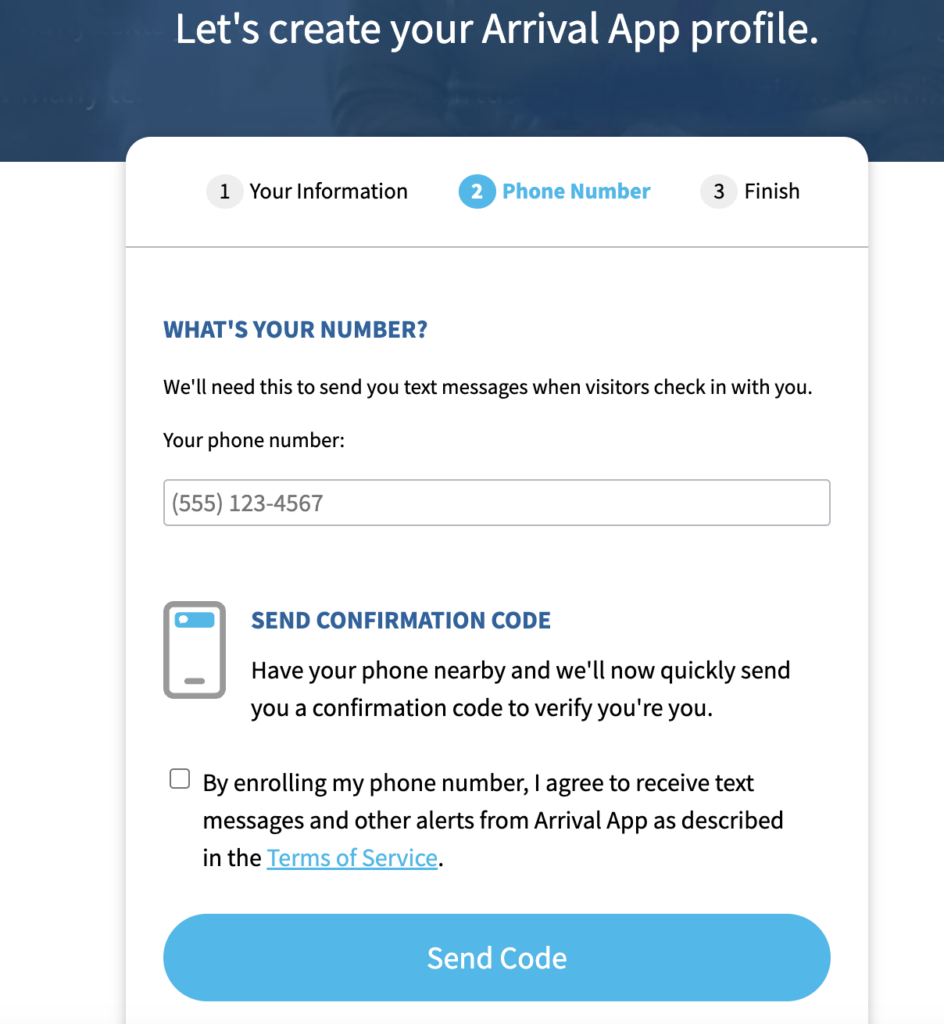
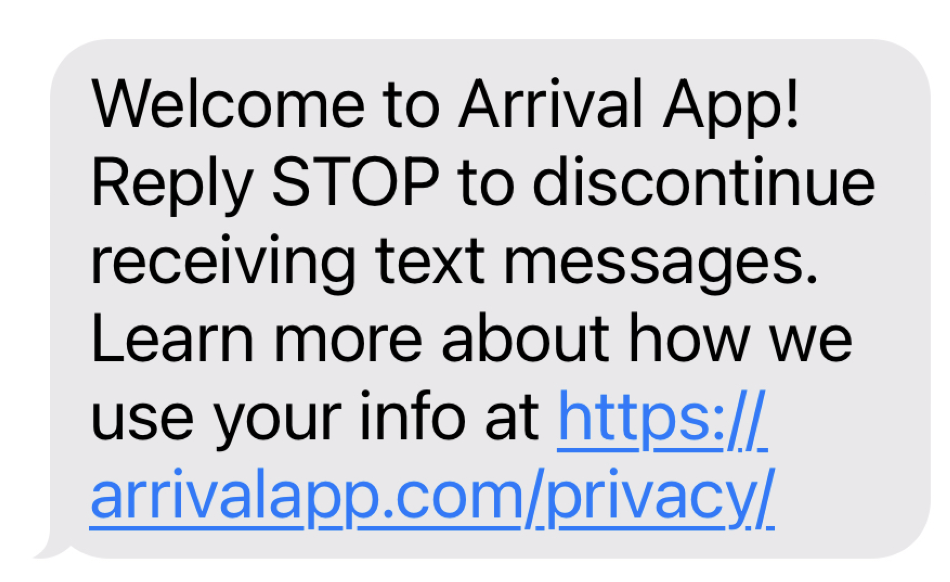
Arrival App will validate their phone number by sending a code to the phone number they provide. As soon as their phone number is validated, they will receive a confirmation text message.
They will be added to the Welcome screen, and will be able to receive text messages from Arrival App when their visitors check in.
For Team members who will not appear on your Welcome screen, once they click on the link in their email, they will be asked to confirm their email address.

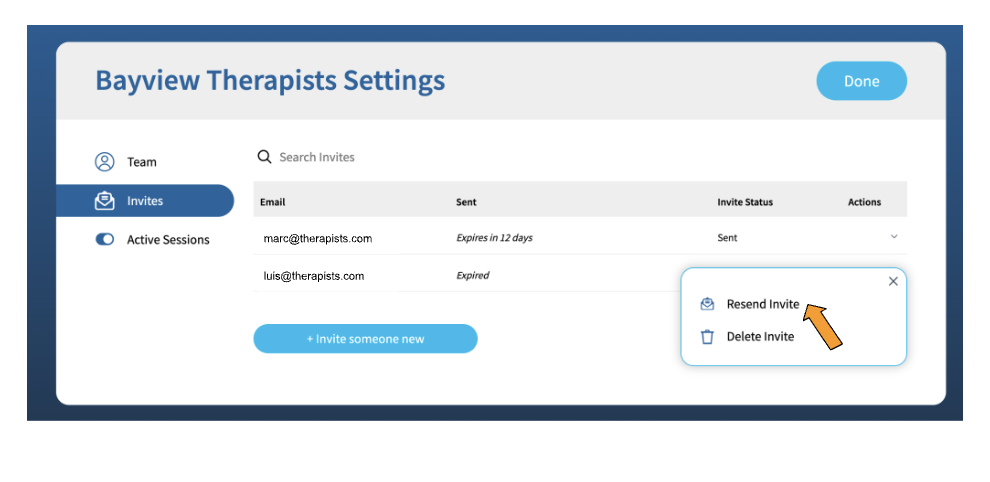
What if a Team member does not receive an Invite?
If a Team member does not receive an invite,
- Double check that you have sent the invite to the correct email address. You can do this by taking the following steps:
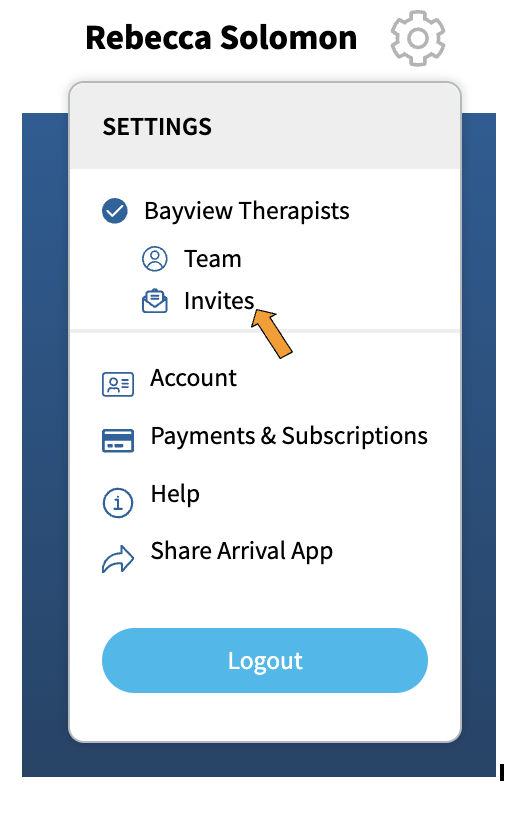
- In Preview Mode, click on the gear icon, and select Invites.
- Confirm that the email address listed for your Team member is their correct email address.
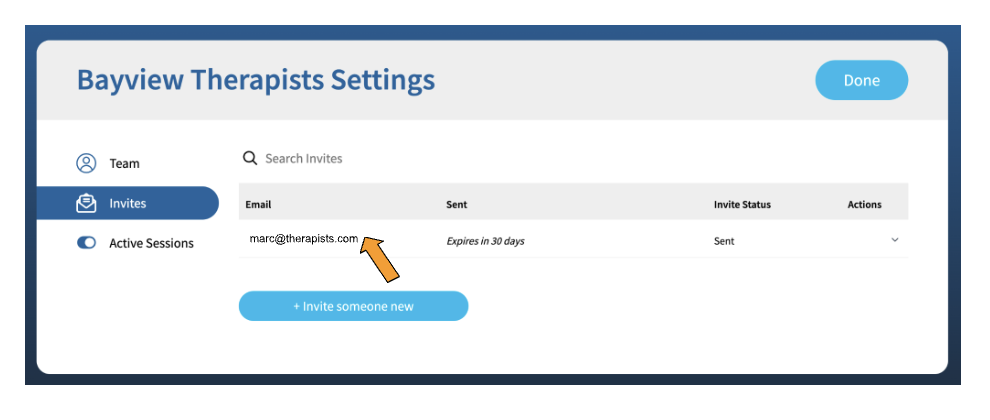
- If there is an error in the email address, under Actions, click on Delete.
- If needed, you can then send a new Invite.
- If you have confirmed that you have sent the Invite to the correct email address, ask your Team member to check their Spam folder.
- If the email address is correct, and your Team member still cannot locate their invite, you can resend the invite by clicking Resend Invite under Actions.
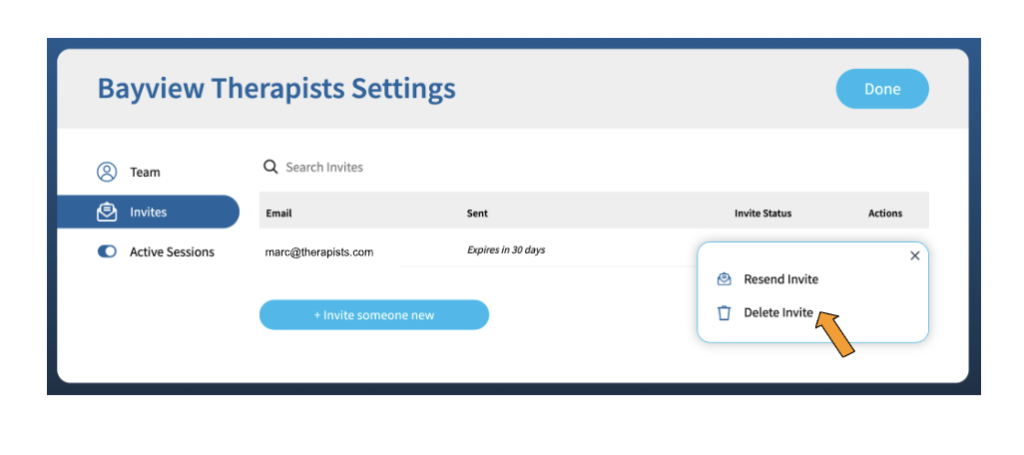
Oops! I sent an Invite to the wrong email address! How do I delete an Invite?
If you send an invite in error, as long as the invite has not been responded to, you can delete it by taking the following steps:
- In Preview Mode, click on the gear icon, and select Invites.
- Find the row with the email address of the erroneously sent Invite, and under Actions, click on Delete.
If the Invite has been responded to, the person who responded to the Invite will now appear on your Team page. If needed, you can delete the user from the Team page.
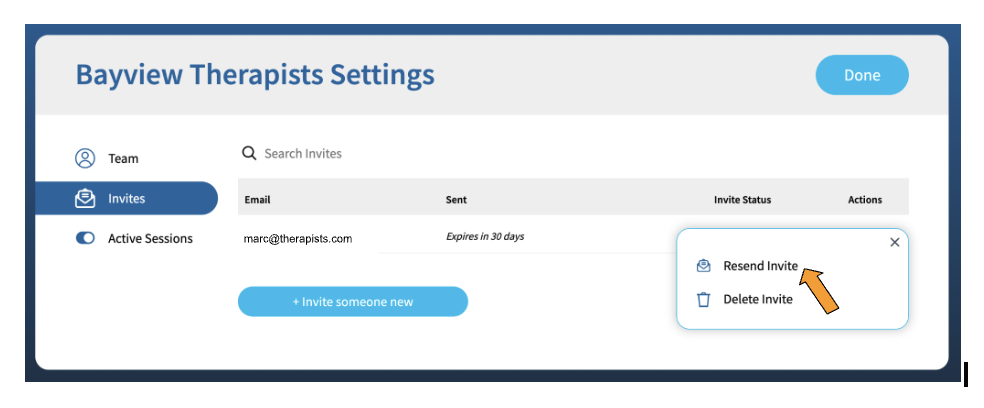
Why do Invites expire?
As a security precaution, invite links expire after 30 days. Invite recipients are notified by email two days before their link expires. If an invite link expires and you need to send another Invite, you can resend the invite by taking the following steps:
- In Preview Mode, click on the gear icon, and select Invites.
- Find the row with the email address of the Team member whose invite you want to resend, and, under Actions, click on Resend.
I received an Invite to Arrival App. What do I do next?
Your colleague has invited you to start using Arrival App, the simple and secure way for your visitors to let you know when they arrive. Arrival App uses text messages to let you know when your visitors have arrived.
Once you click on the link in your email invite, depending on the role your colleague has designated for you, you will be asked to provide some or all of the following information:
- Display name, i.e., how you wish to appear on the Welcome screen. For example, you may wish to appear as Dr. Jane Smith, or Jane Smith, MD.
- Confirmation of your email address.1 We need to confirm your email address so that, if needed, you can use your email to log into Arrival App. Alternatively, down the road, if your phone number changes, Arrival App will use the email address you provide to send you another invite for you to authenticate your new phone number.
- Your phone number.1 This is the number Arrival App will use to send you text messages when your visitors check in. To validate your phone number, enter the phone number where you receive text messages.
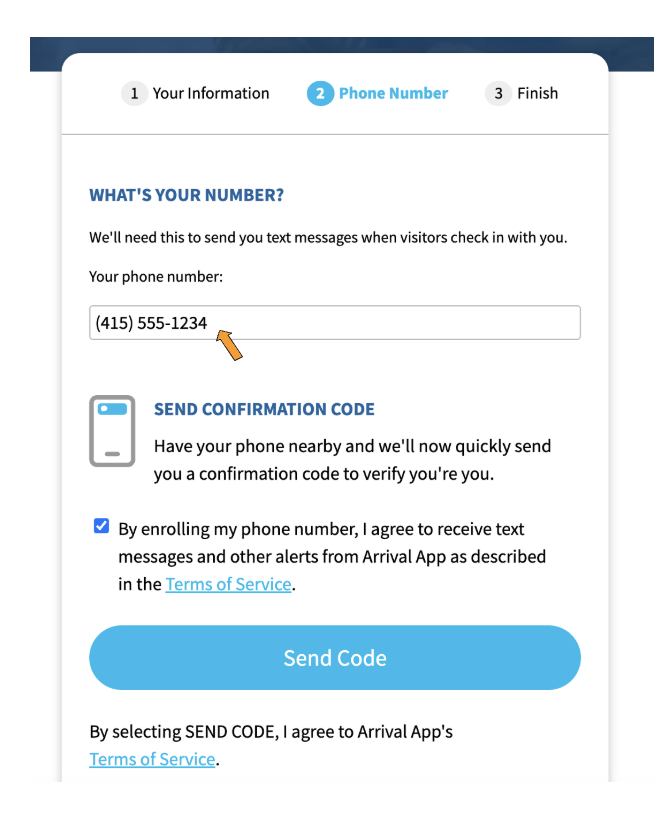
- Arrival App will then send you a 6-digit code. Once you receive that code, enter it in the field provided.
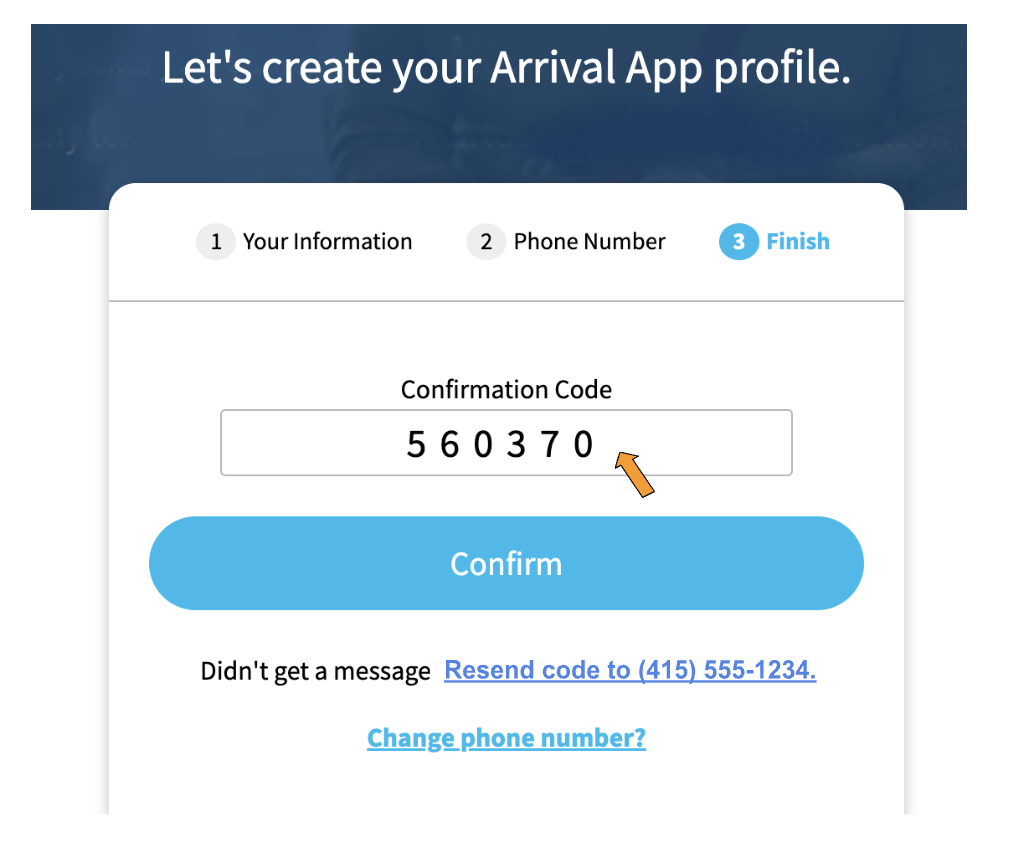
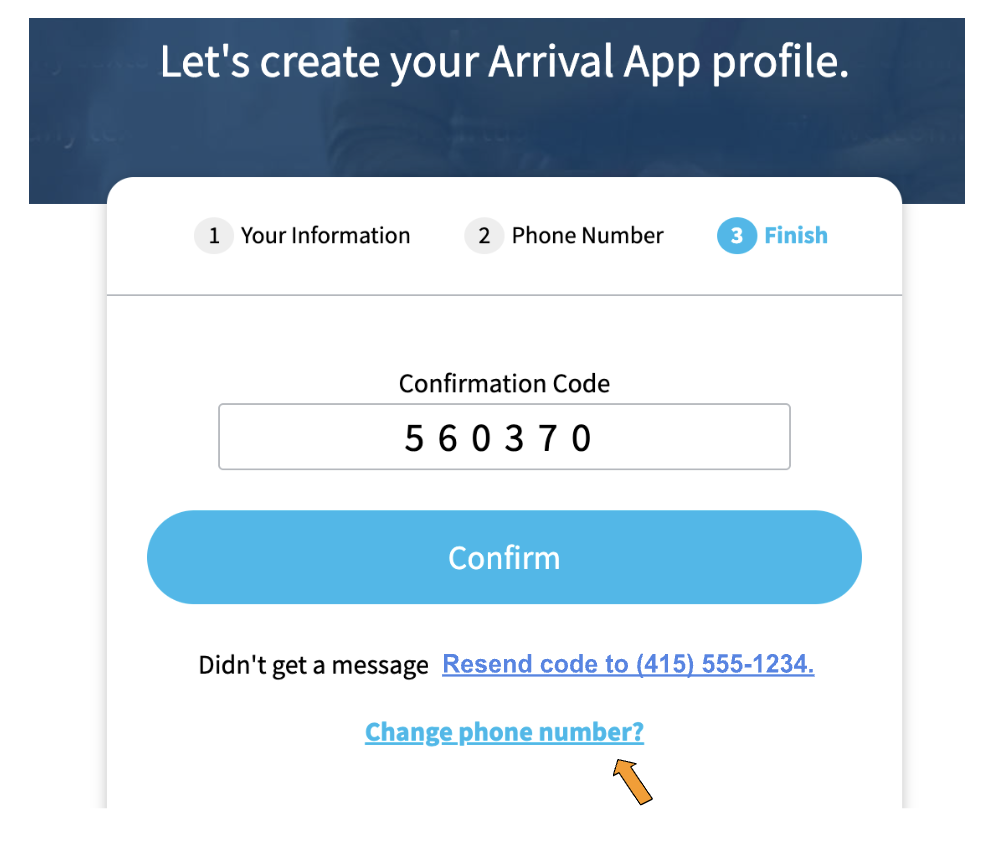
- If you do not receive the code within one minute, double check that the phone number you entered is correct.
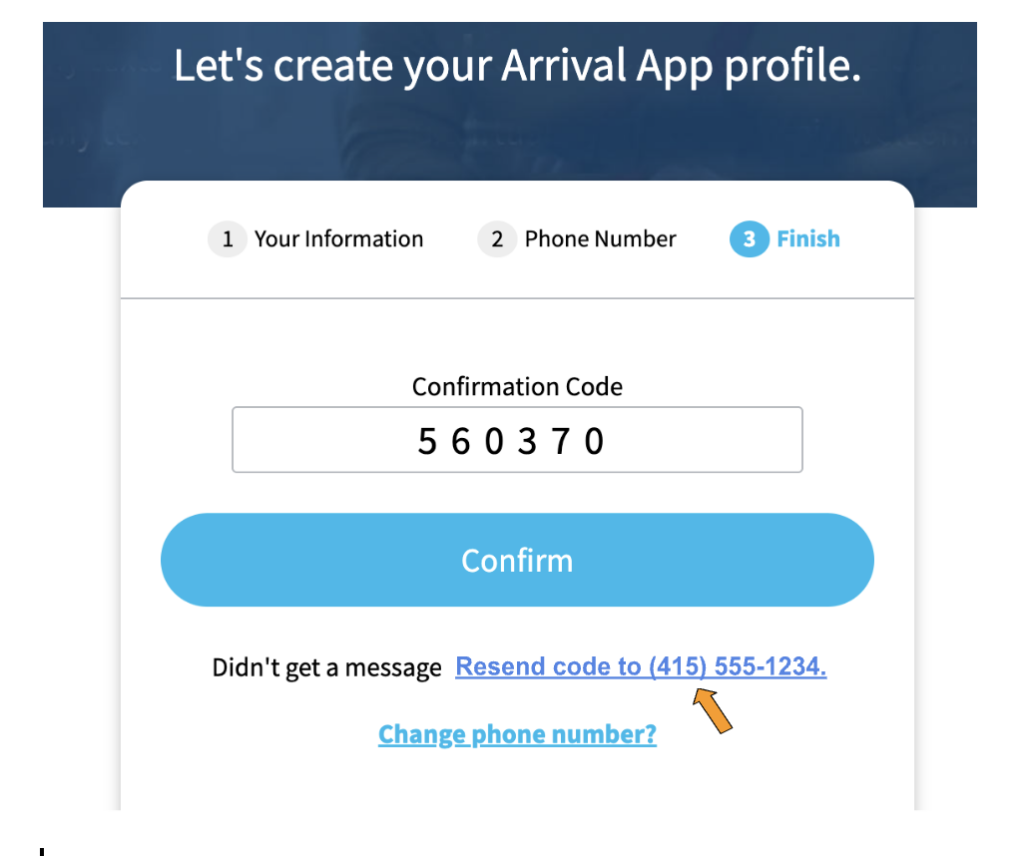
- If it is, click Resend code. If it is not, click Change phone number, then enter the correct phone number to receive your code.
- Once your phone number is validated, you will receive an introductory message from Arrival App.
- You will also begin receiving text messages when a visitor of yours arrives.

See also: Can I use Arrival App if I don’t have good cell reception in my office?
NOTE: If you reply to STOP to the introductory message from Arrival App, or to any future text notification from Arrival App, you will no longer receive notifications when your visitors arrive. Learn more.
**
- Don’t worry, Arrival App never shares your email or address or phone number, and, once you complete the phone number validation process, the only text messages you will receive from Arrival App will be when your visitors arrive. Learn more about how Arrival App uses your info at https://arrivalapp.com/privacy/. ↩︎